New Blog
Head on over to the new site ‘Fine Feathered’ for updates! http://www.finefeathered.wordpress.com
Natural Teeth Whitener

Oil pulling is one of the latest trends that is re-emerging, however it’s an ayurvedic practice that’s been around for hundreds of years. Either way, I’m glad the knowledge and beauty of this effective and natural remedy is spreading. Now generally most people who take part in oil pulling do so with a high quality oil, such as Organic Coconut Oil or Organic Sesame Oil. I prefer the coconut, just for convenience reasons since I have countless jars of it stashed away in my pantry.
Needless to say, oil pulling does wonders for your oral health. It has been shown to whiten teeth, clear skin, and help reduce headaches. I’ve written a detailed post on oil pulling on my instagram account, @nicolejanaye , but I’ll briefly describe the process behind oil pulling and then get into my advanced formula.
Oil Pulling: An ayurvedic practice that involves swishing (pulling) a high quality oil (organic coconut/sesame oil) in your mouth for 20 minutes. The idea behind it is that the oil pulls the toxins from your mouth. This is how people notice a difference in their teeth, skin, and headaches. The toxins are eliminated through the oil and out the body.
A few tips that I’ve found through my experience and research:
-oil pull first thing in the morning, before drinking water/brushing teeth…
-spit oil in the trash can!! (VERY IMPORTANT) If you are oil pulling with coconut oil and you spit it in the sink, toilet, or shower, the oil will solidify once it cools down and eventually clog your pipes
-NEVER swallow the oil. It is full of toxins! Make sure to spit it all out and thoroughly rinse your mouth and brush your teeth prior to consuming any liquids or food.
-People complain about the length of oil pulling or the taste. I’ve never had a problem. I’ve actually found that I’m much more productive in the mornings that I oil pull. I recommend to stay busy while oil pulling. If you have a hard time pulling for 20 minutes, then I suggest you stay active by cleaning your bedroom, taking a shower, putting on makeup, doing the laundry, washing the dishes…You’ll find that you will easily hit 20 minutes and very often exceed the time.
-do not heat up the coconut oil in order to melt it. The warmth from your mouth will naturally liquify the oil. I chew the coconut oil 2-3 times and it quickly dissolves into liquid.
Now I’ve been doing this basic oil pulling method for some time now and I’ve noticed positive results. However, the more I research alternative medicine and holistic health the more I find new ingredients that can also benefit the health of your oral cavity.
Advanced Oil Pulling Formula
1 TBS Organic Coconut Oil
1 Capsule of Activated Charcoal
Essential Oils: Peppermint, Tea Tree, and Eucalyptus, Lavender (3-4 drops total, not each)
Activated Charcoal
Most likely you’re shaking your head as to why you would want to put charcoal in your mouth or anywhere near it for that matter. This stuff is not the same product that you would use to barbecue up some ribs. It’s a natural product used to detoxify the body. Many people take it as a supplement to help with detoxification, hospitals have it ready to help heal people of poisons, and it’s also beneficial in removing stains. Activated charcoal loves tannins, which are the main culprit in coffee, tea, and wine that brings that awful stain to your teeth. Adding activated charcoal to your oil pulling remedy will provide an extra bonus of removing stains from your teeth.
Essential Oils
These oils are particularly good for cleansing, healing, and soothing the oral cavity. Use all four oils or any combination that you might have. If you feel that 4 drops is too potent than reduce the concentration of oils.
Directions:
1. Carefully open the capsule of activated charcoal and pour into mouth*
2. Scoop 1 TBS organic coconut oil out onto a spoon.
3. Drop your combination of essential oils onto the coconut oil.
4. Place in mouth.
5. Chew down until the mixture has completely liquified.
6. Swish in mouth for 20 minutes.
7. Spit in trash can
8. Rinse mouth with water
9. Brush teeth.
10. Done!
*The reason why you want to pour the activated charcoal directly into your mouth is because it will pull the toxins from your metal spoon (if that’s what you use). Just avoid using the spoon with this step.
You’ll notice that your teeth will be a little grey after you spit out the oil. Don’t fret, rinse your mouth out a few times and brush your teeth for a few minutes and the dark color will quickly fade away.
I hope this taught you guys a little bit more about alternative options for cleaning your teeth and whitening them! Give this advanced teeth whitening method a try!!
Simple Summer Side Salad
 Woa, that was a mouthful.
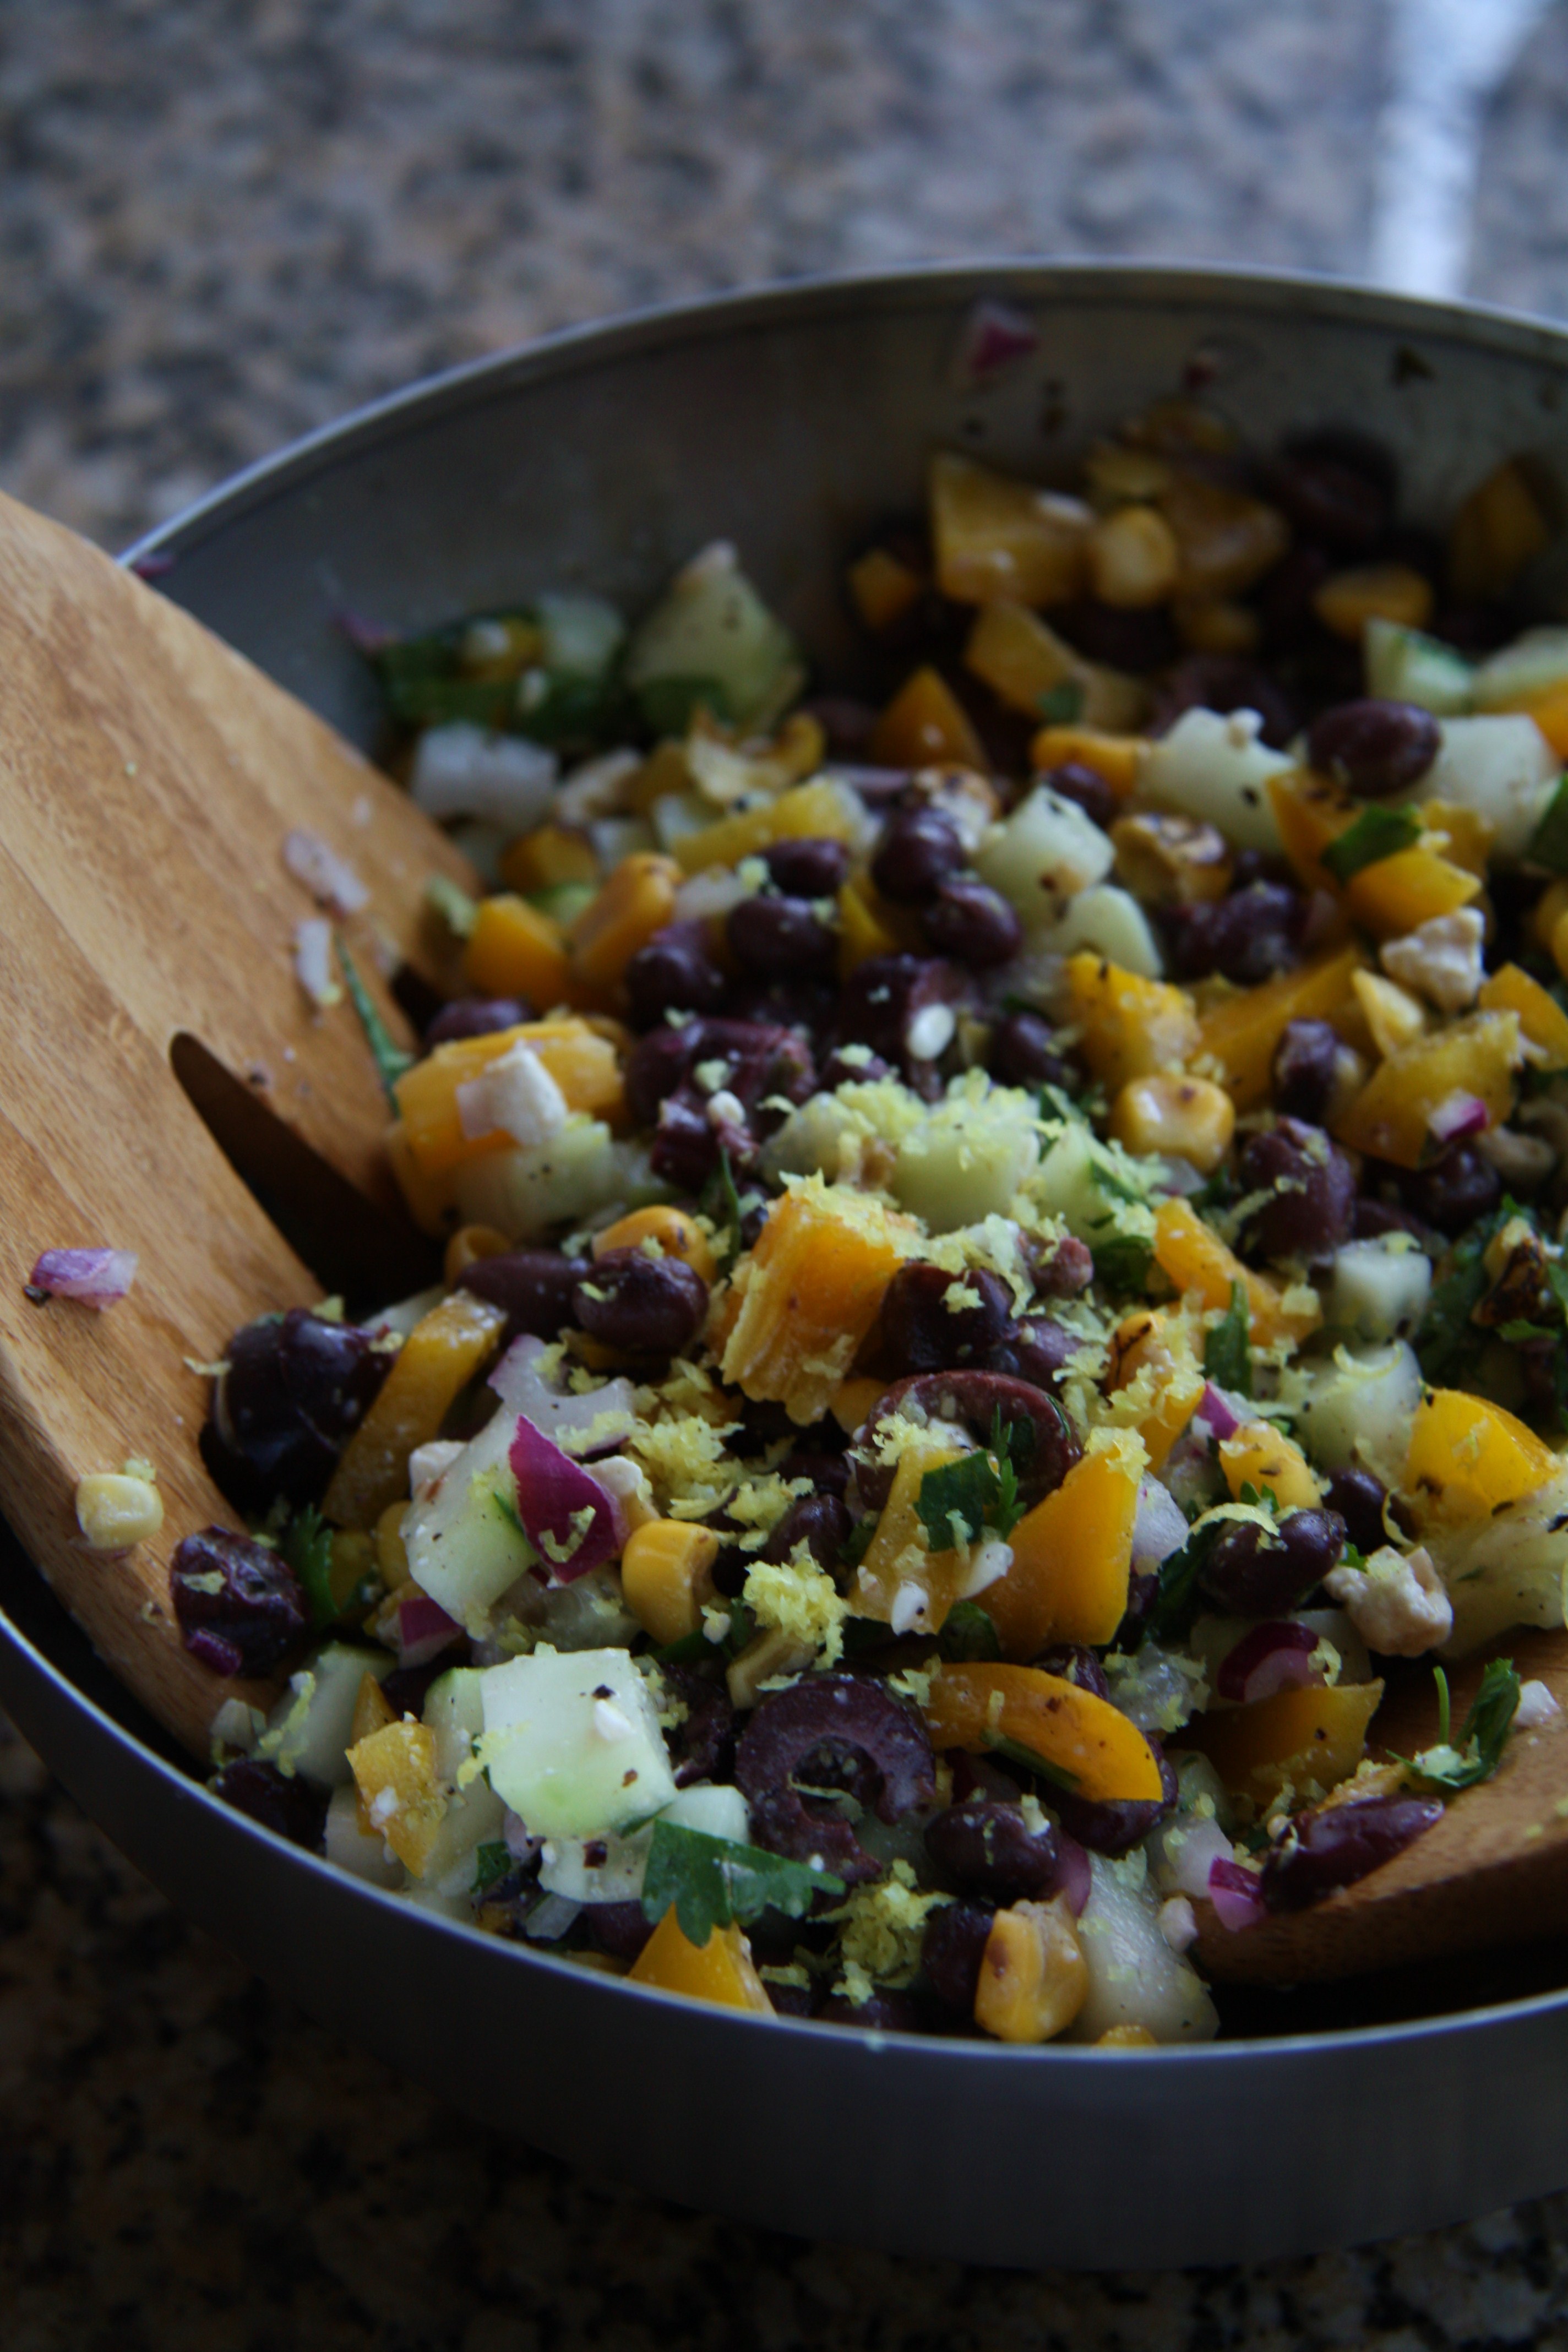
After whipping this recipe up, you’ll want a mouthful as well. In our household, we like to keep our dishes simple, easy to make, and of course keep it healthy. This salad was something I just came up with while looking through my refridgerator. I wanted a salad that had protein, was flavorful, and could be used as a delicious side to any meal or even by itself. The ingredients are easy to come by and I’ll guess that you have a majority of them already in your kitchen. Many of the ingredients can be replaced with similar ones for your preference and convenience. Try using parsley instead of cilantro, or perhaps use a blend of fresh herbs. Mix in fresh or sun-dried tomatoes to intensify the flavor of this salad. You can even make this a non-vegetarian dish but adding grilled chicken or roasted fish. There are so many ways to personalize this salad! Try this recipe out for tonight’s dinner or bring as a side to your next party.
 Ingredients:
- 1 yellow bell pepper; chopped
- 1 cup roasted corn; (I use the frozen bags from Trader Joes)
- 1/2 can (8oz) of black beans; drained and rinsed
- 1/2 large cucumber; peeled and chopped
- 1/4 red onion; chopped finely
- 1/4 cup feta cheese; crumbled
- 10 kalamata olives; chopped
- 1/2 lemon; juiced and zested
- handful of cilantro; chopped
- 1/8 cup raw apple cider vinegar
- 2 TBS olive oil
- 1 TBS Annies Organic Goddess Dressing (can be omited, but is a great addition!)
- 1/4 tsp garlic powder
- 1/8 tsp black pepper
- 1/8 tsp sea salt
As far as directions, just combine everything. I told you it was simple.
Enjoy!
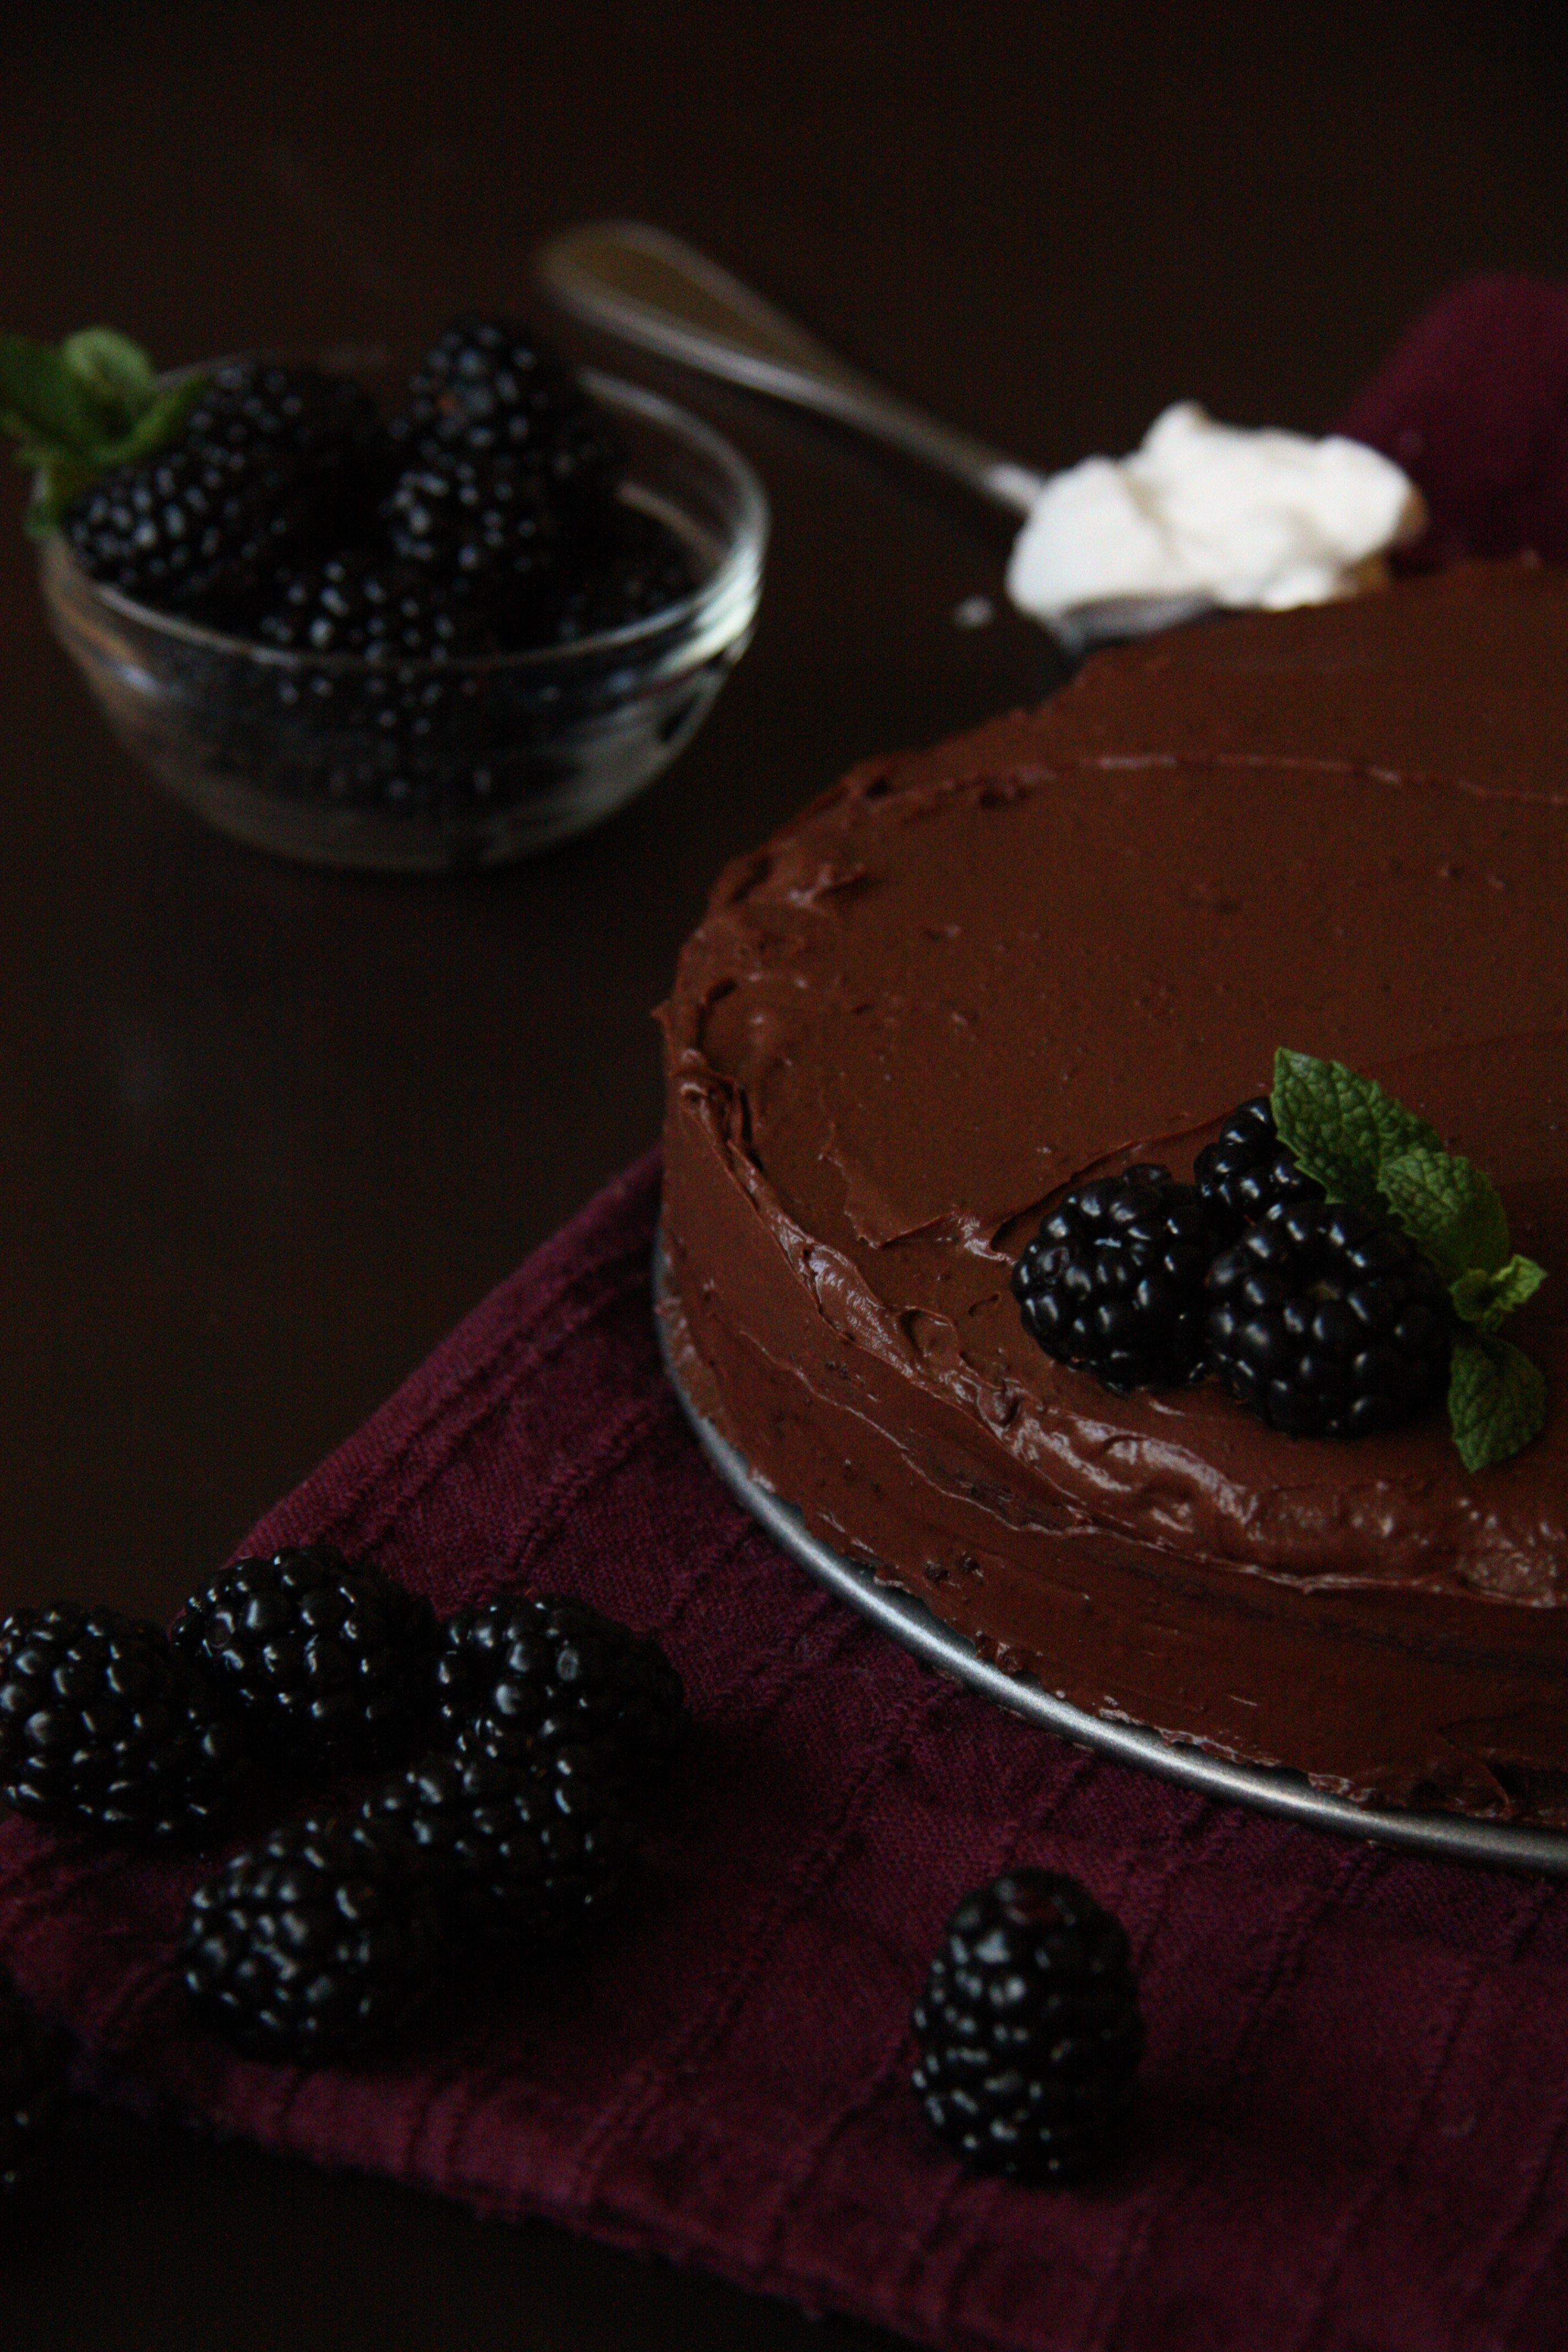
Chocolate Quinoa Cake
 Something about this rich, dark chocoalte has got my head spinning. I’ve been craving for a deccadent chocolate recipe lately. Whether it’s a brownie, cake, or even chocolate mouse; I want it. I happen to be working one day on the register at Whole Foods and an interesting selection of ingredients came through. I’m constantly exchanging ideas and recipes with customers. This particular customer happen to tell me that she found a new chocolate cake recipe that looked “so delicious” and “incredibly simple to make”. For the majority of customers coming through Whole Foods, many of them are aware and practice gluten-free methods in their kitchen. As soon as she mentioned that it was gluten-free, I was hooked.
As customers were piling up at the line behind her, I was somewhat frantic at the fact that I would not be able to attempt this recipe or even see it for that matter. She kindly grabbed her groceries, folded away her dollar bills, and stepped aside to a vacant check-out stand. There she pulled out her phone and an empty piece a paper, and scribbled away some seriously important information. We exchanged a few words and then she was off. Only two more hours and then I could do my digging on this chocolately goodness of a recipe.

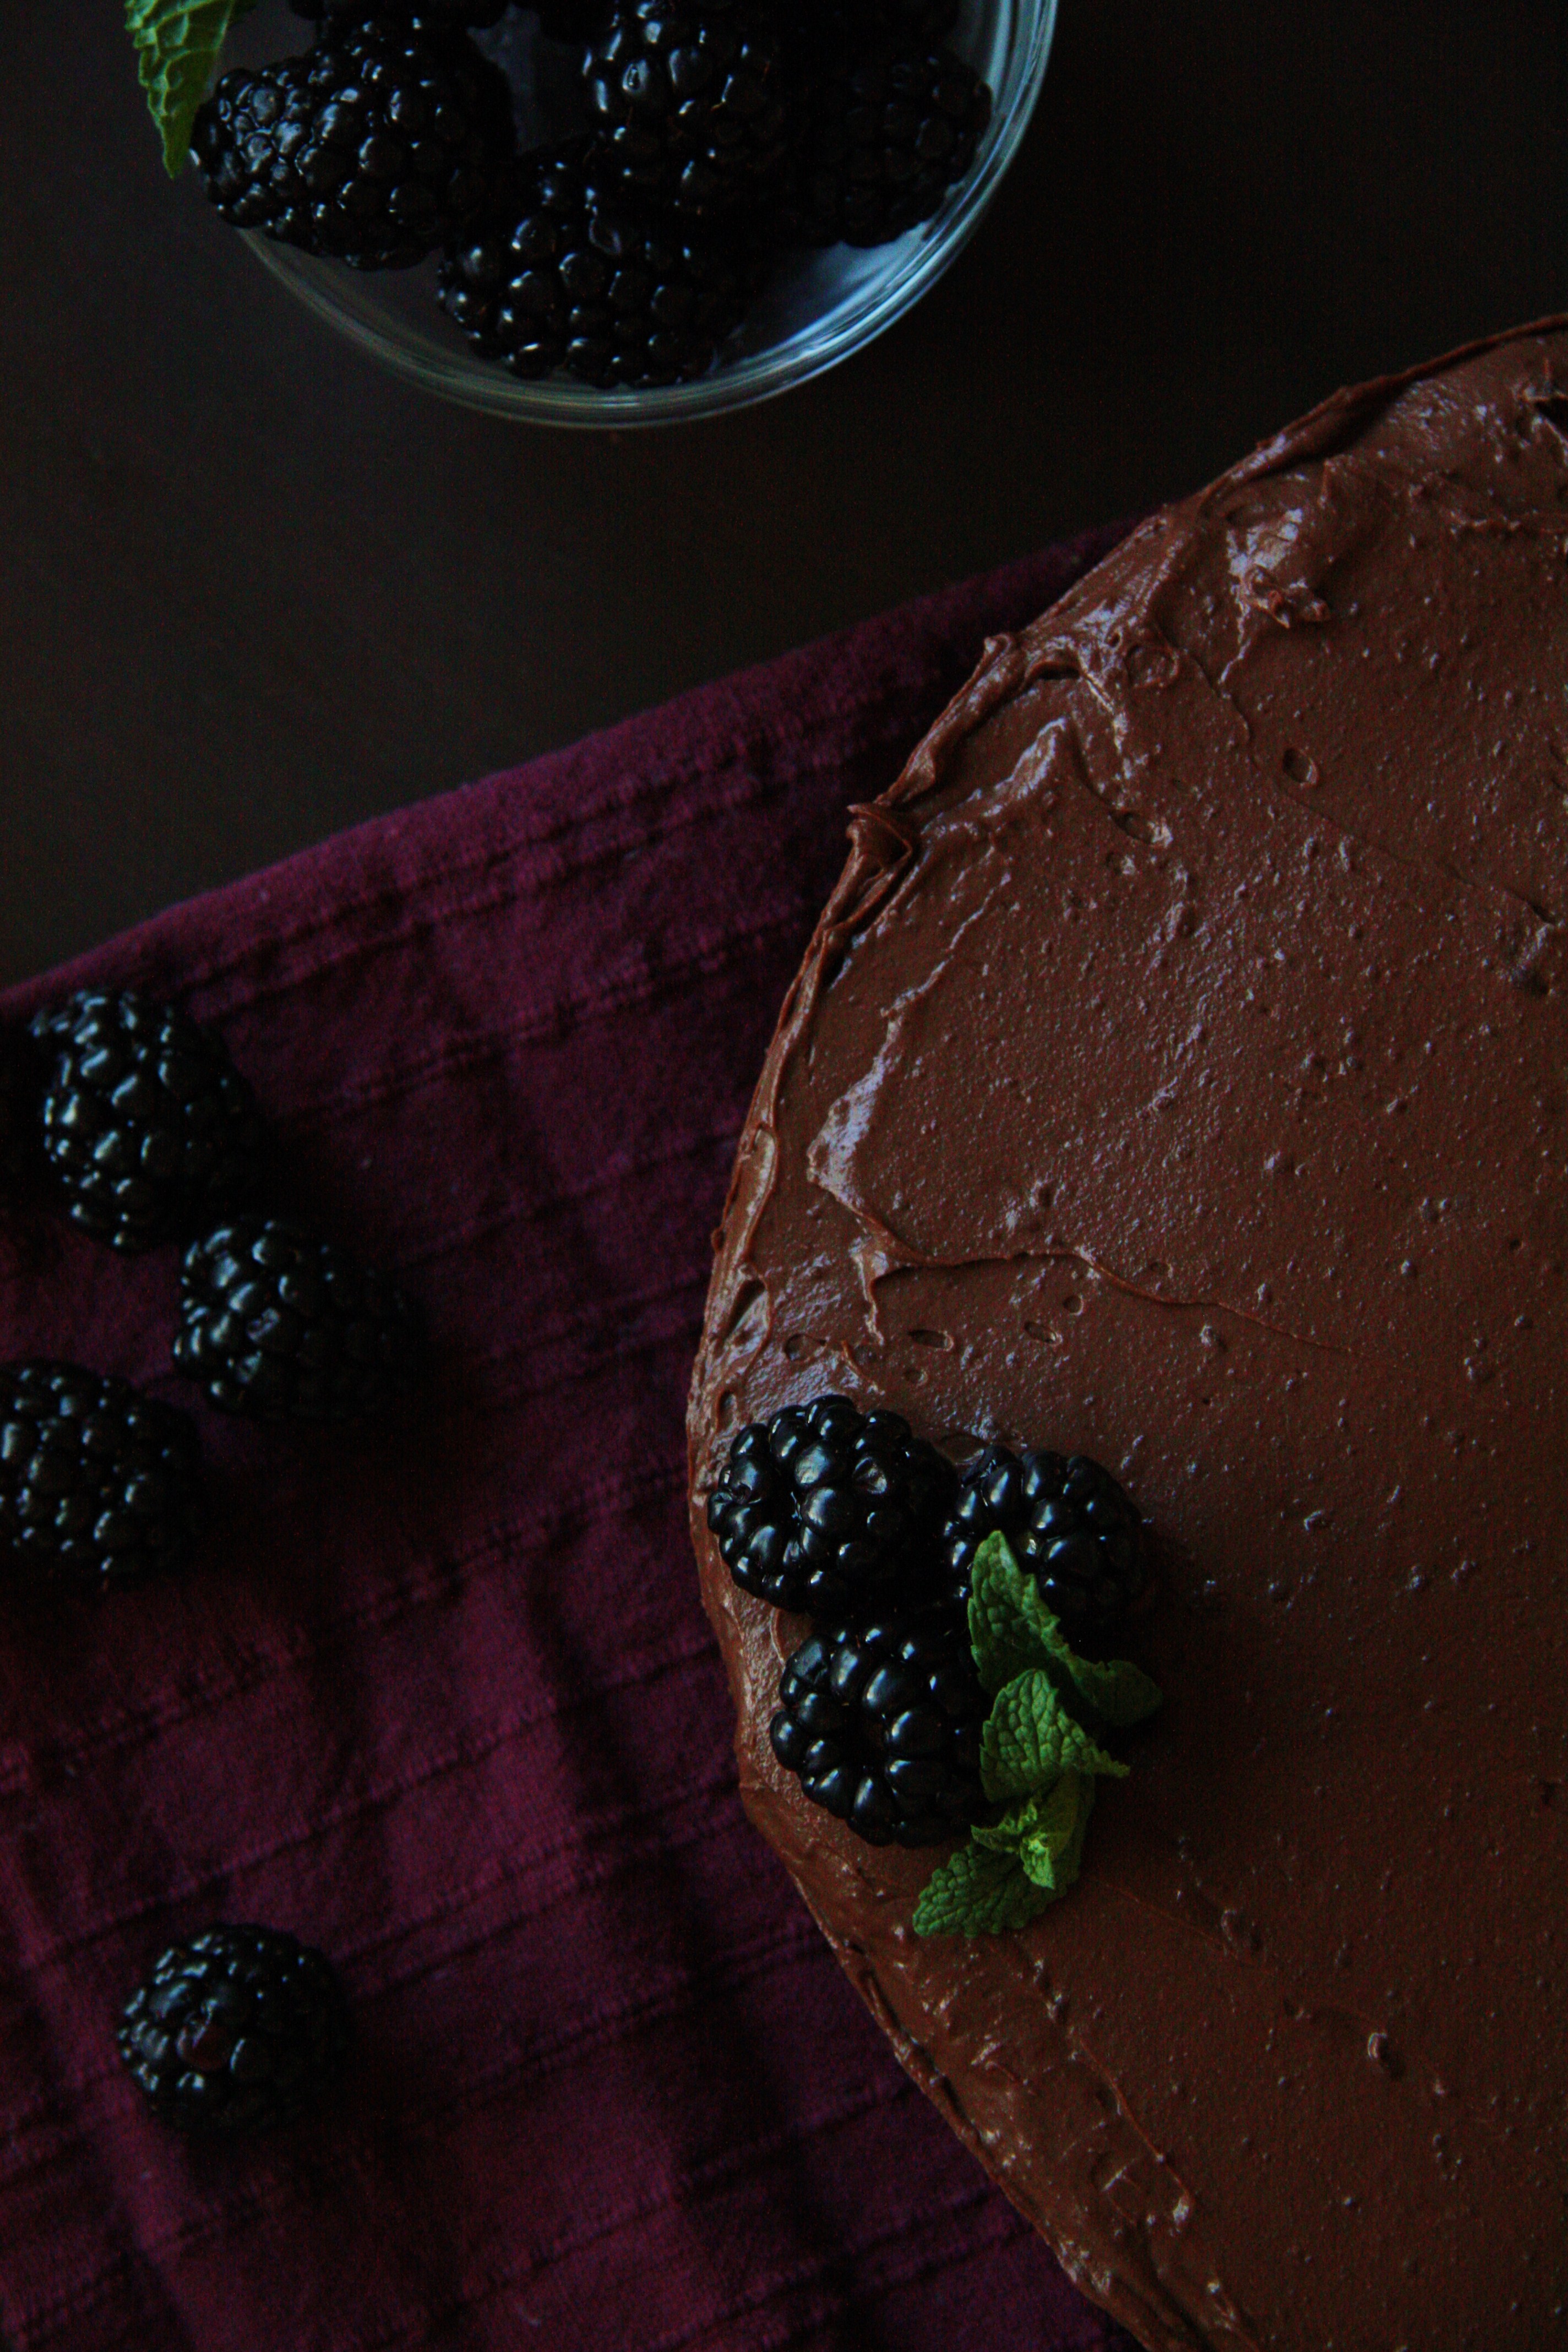
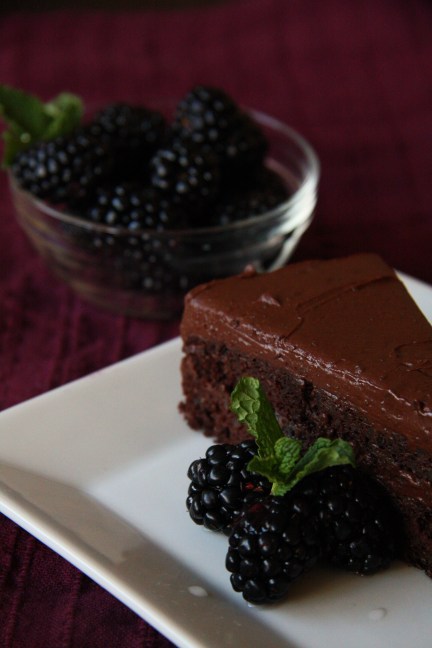
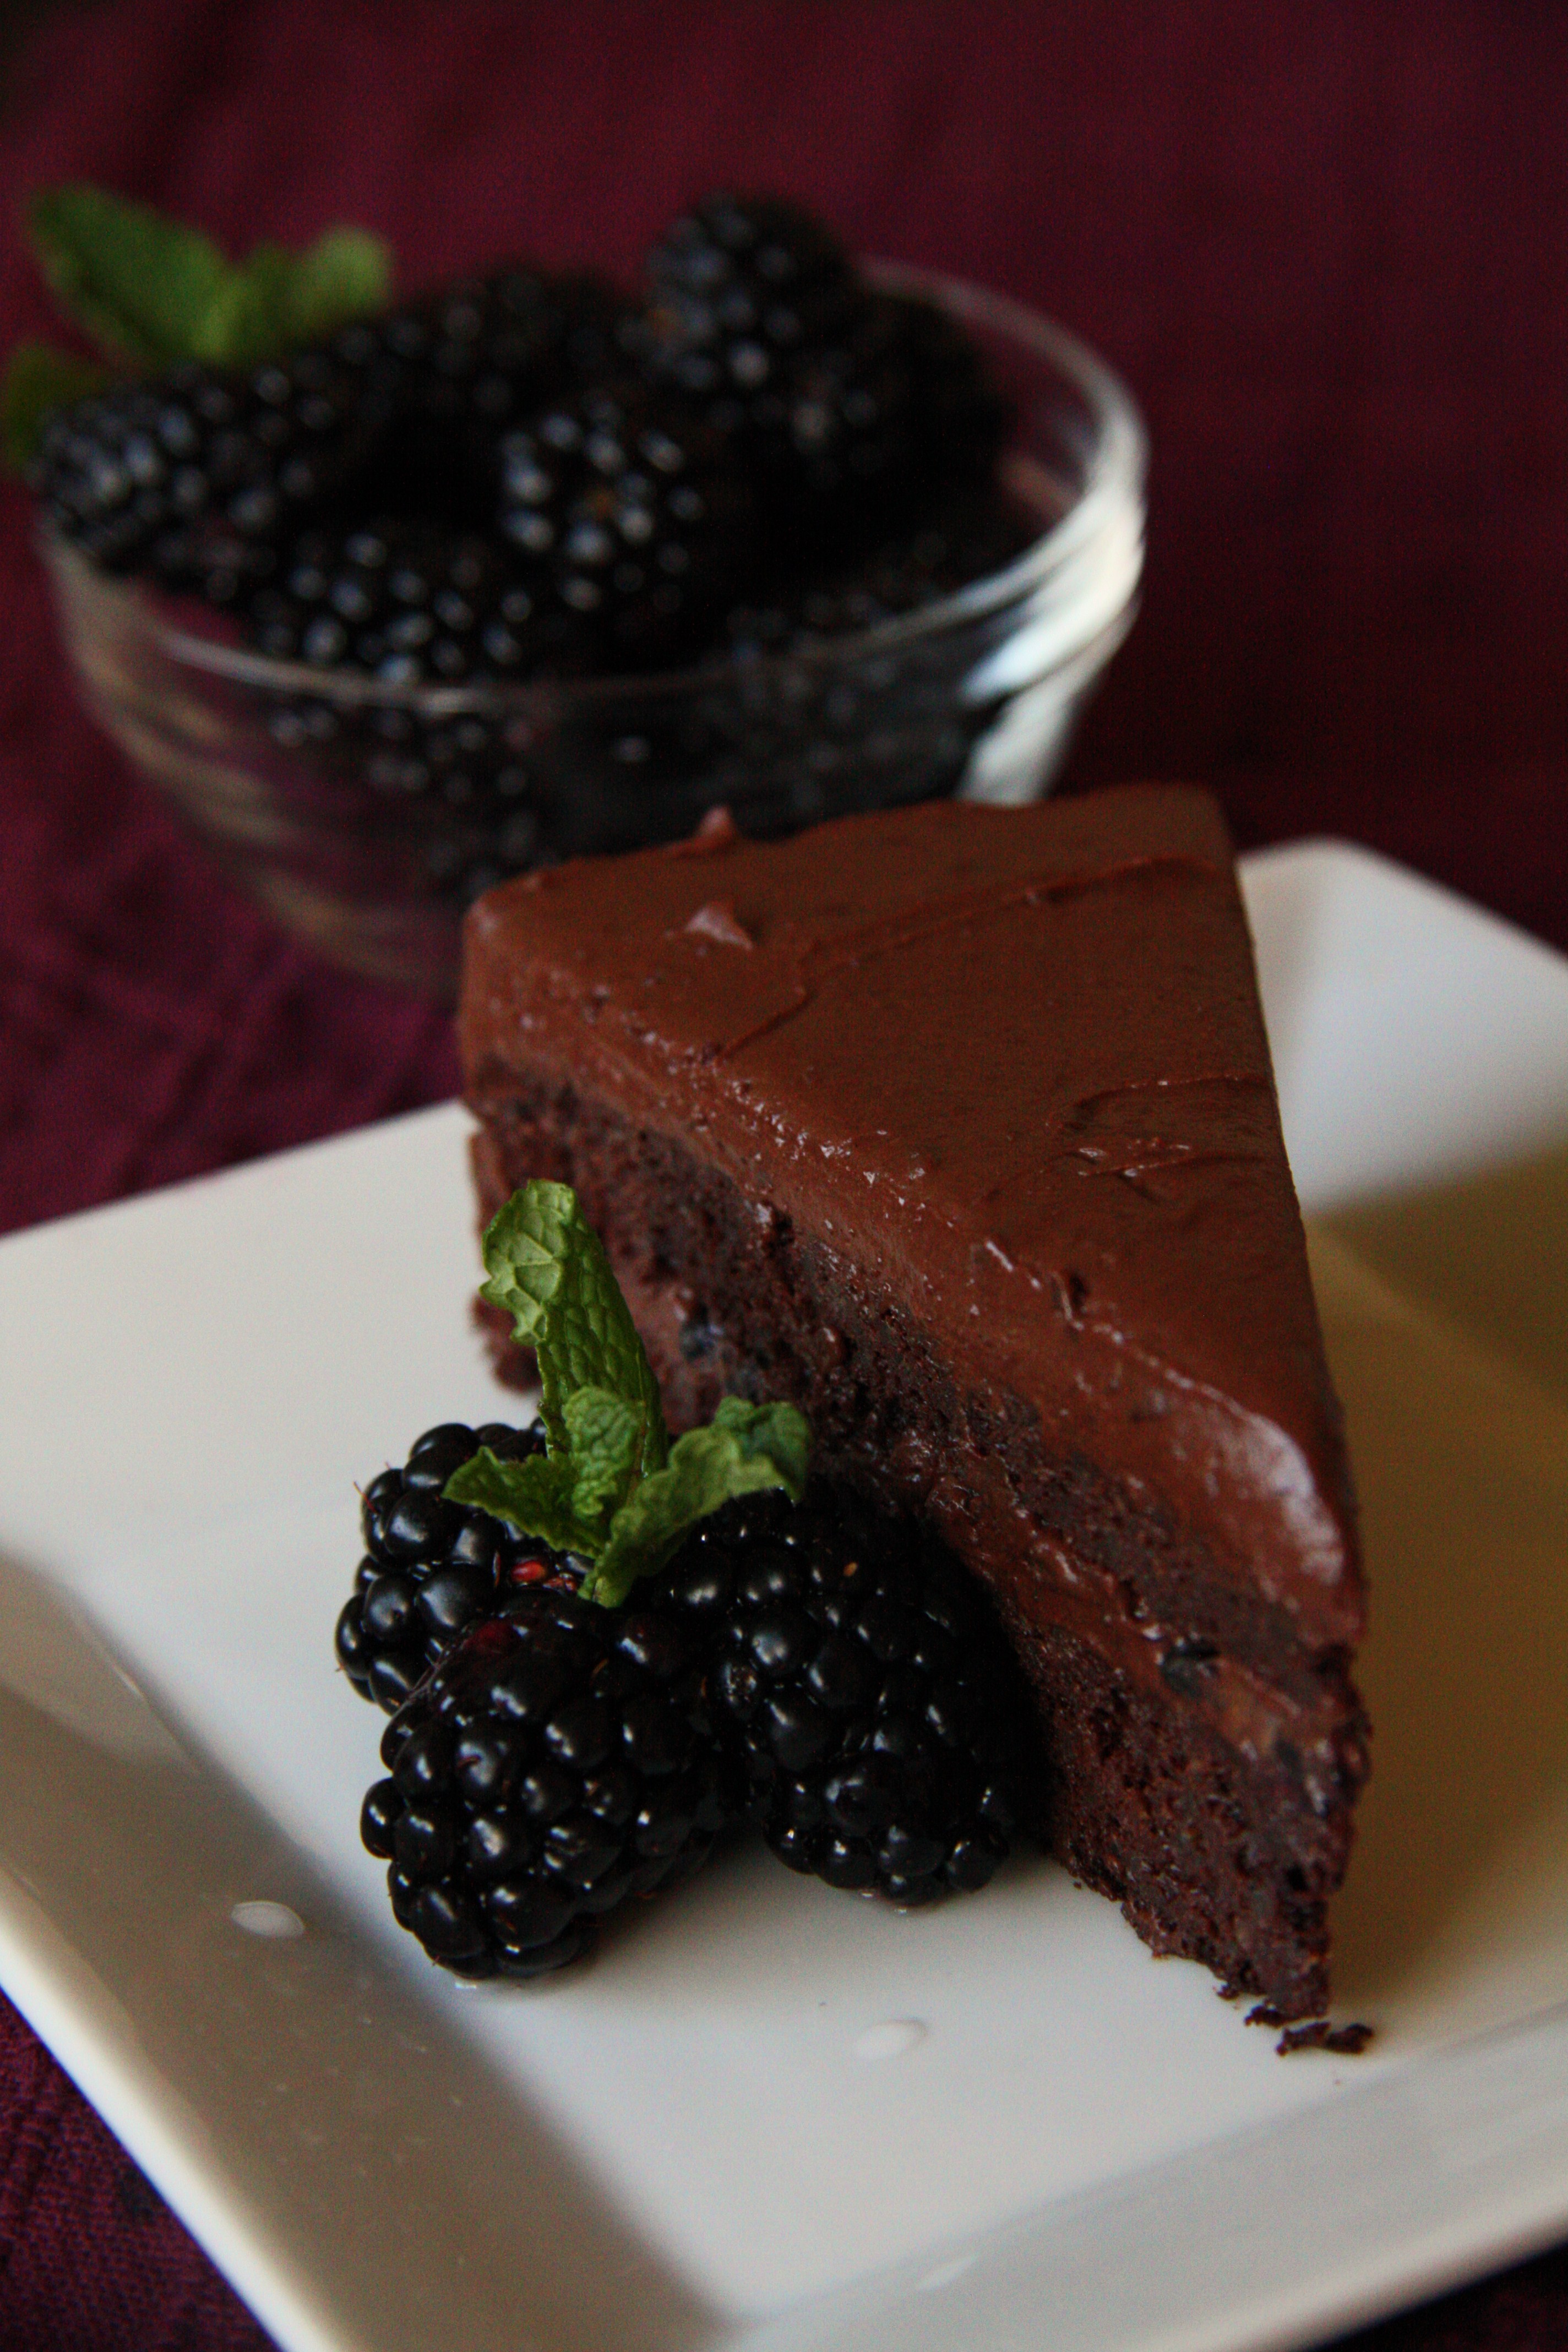 After a few short minutes of getting home and unpacking the laptop, I had the Chocolate Quinoa Cake recipe up and running on my computer. Sarah from ‘Making Thyme for Health” is the creater of this delicious cake. Not only is this beautiful lady the one who designed this dark and rich perfection, but her other recipes and photos are all uniquely inspiring.
I followed her recipe, but added sliced blackberries in the center as well as on top. I whipped up some coconut cream and put a dallop on the top of my slice. My dad has always complained to me that I never ‘follow’ recipes. I’m always trying to re-due them in my own way without testing out the original recipe first. My reason for this is because I want to adjust the ingredients to my diet as well as taste. However, I’m slowly learning that trying out the original recipe isn’t such a bad idea after all. My next attempt at this chocolate cake will be to replace the white sugar with a healthier version. I’ve researched into xylitol and to be honest, I’m not a fan. For me, I’ll stick with ‘all natural’ sweeteners like honey, agave, maple syrup, bananas, and dates. Now it’s just a matter of balancing out the sweetness as well as the getting the texture just right.
But in the meantime, head over to Sarah’s blog, Making Thyme for Health, and make this chocolate cake for yourself!
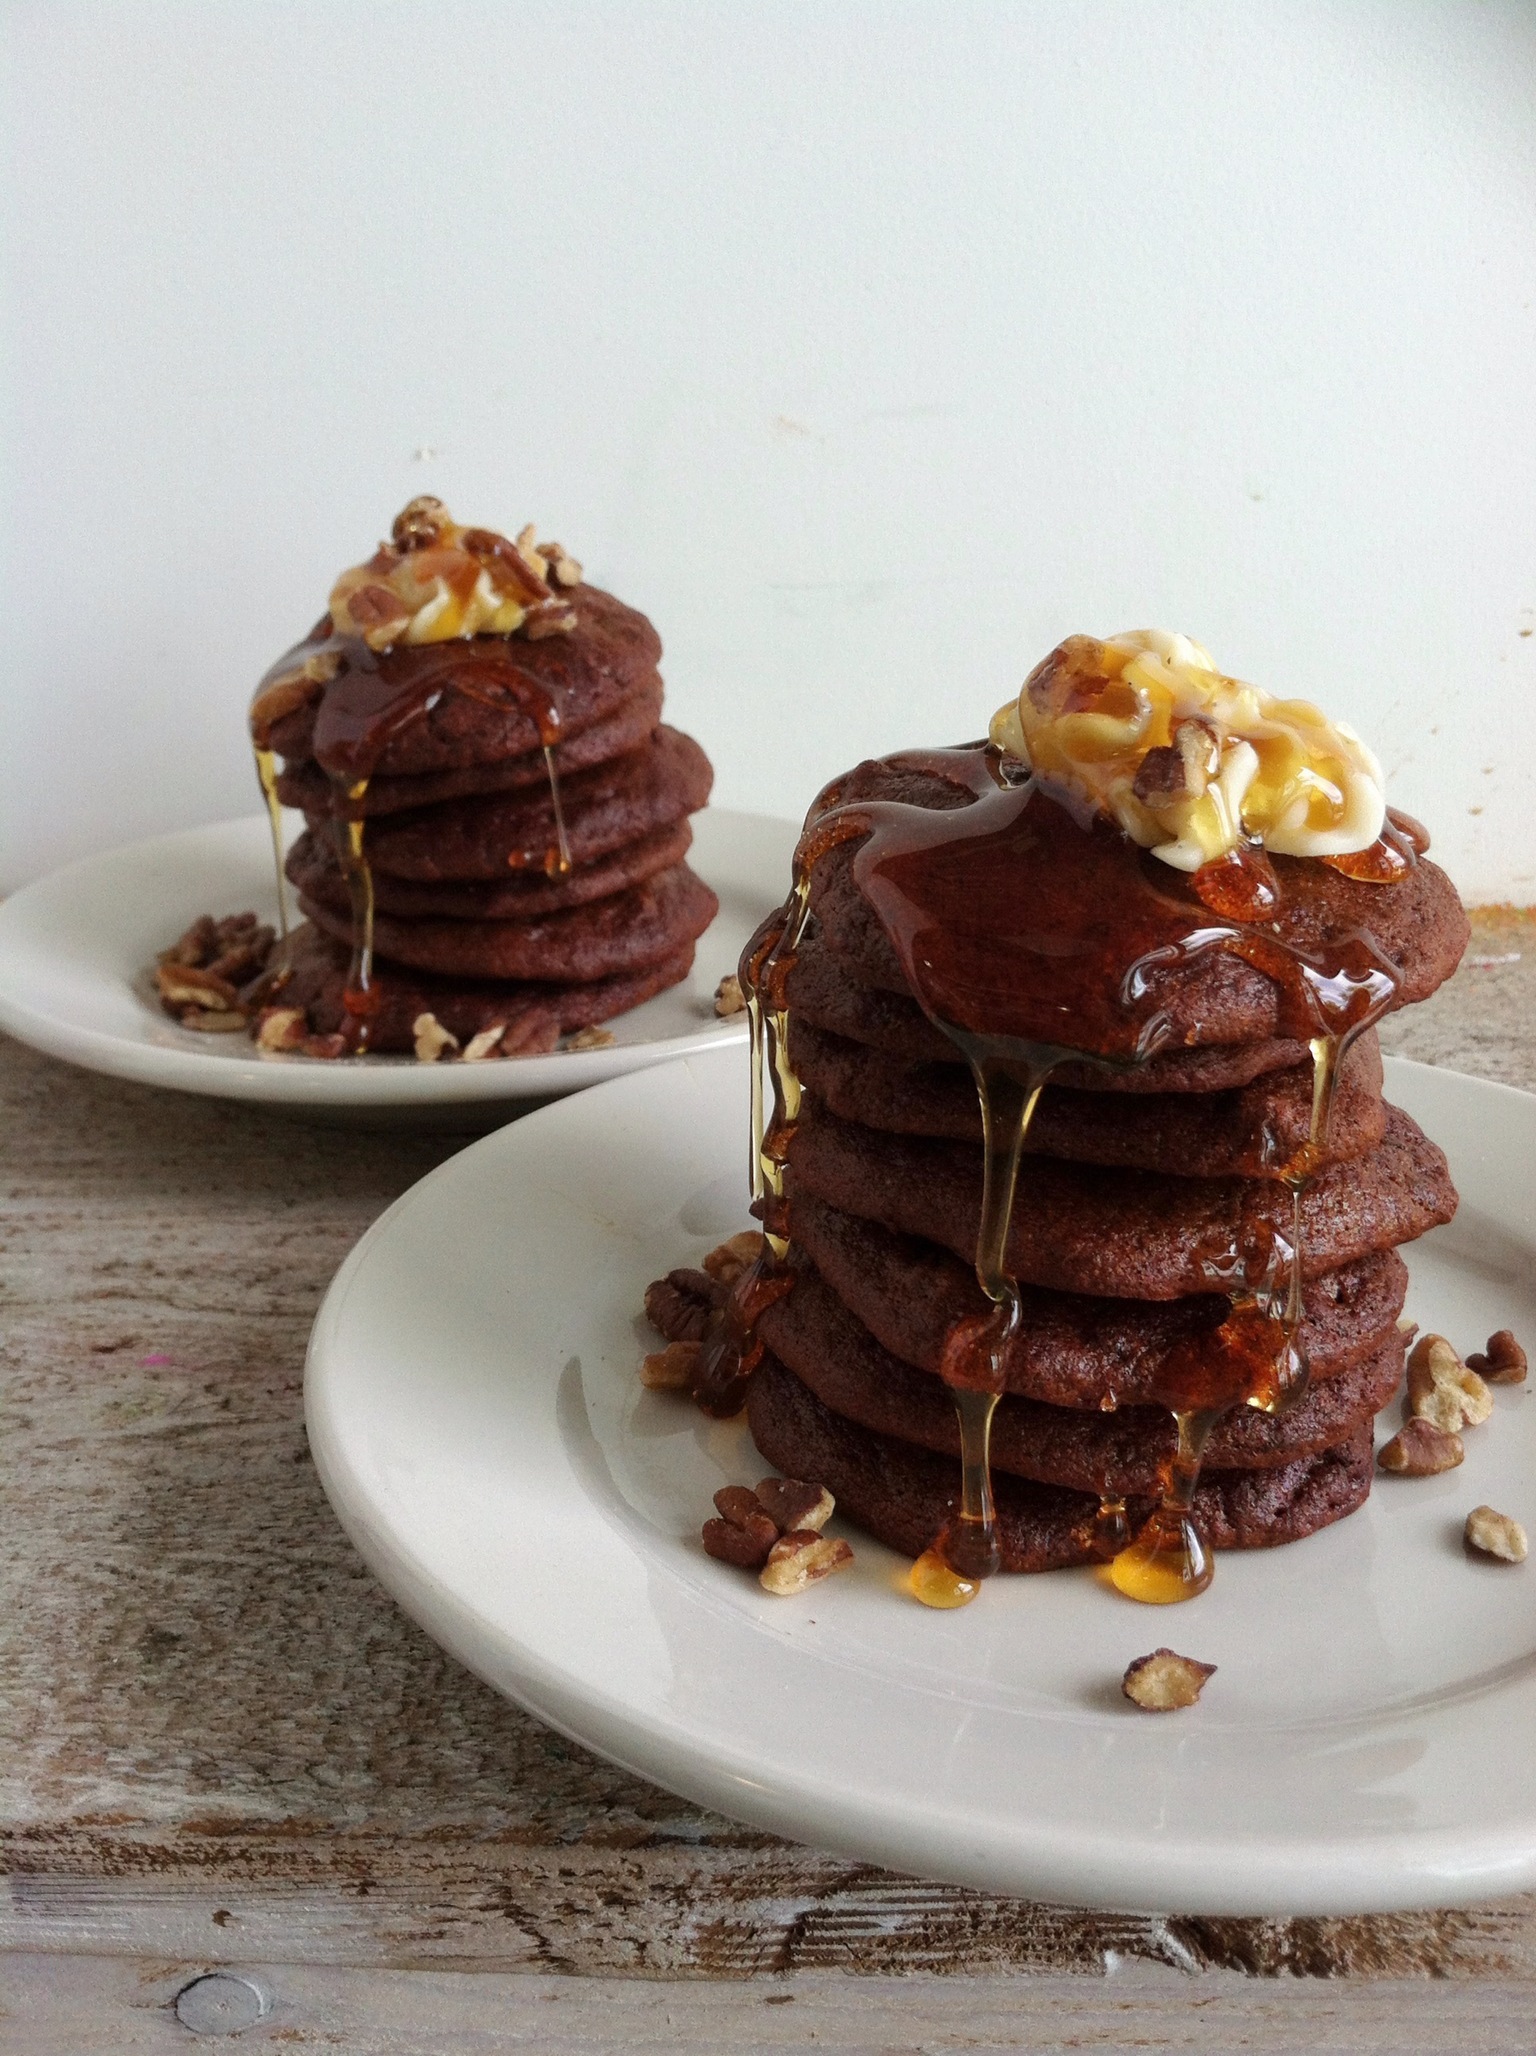
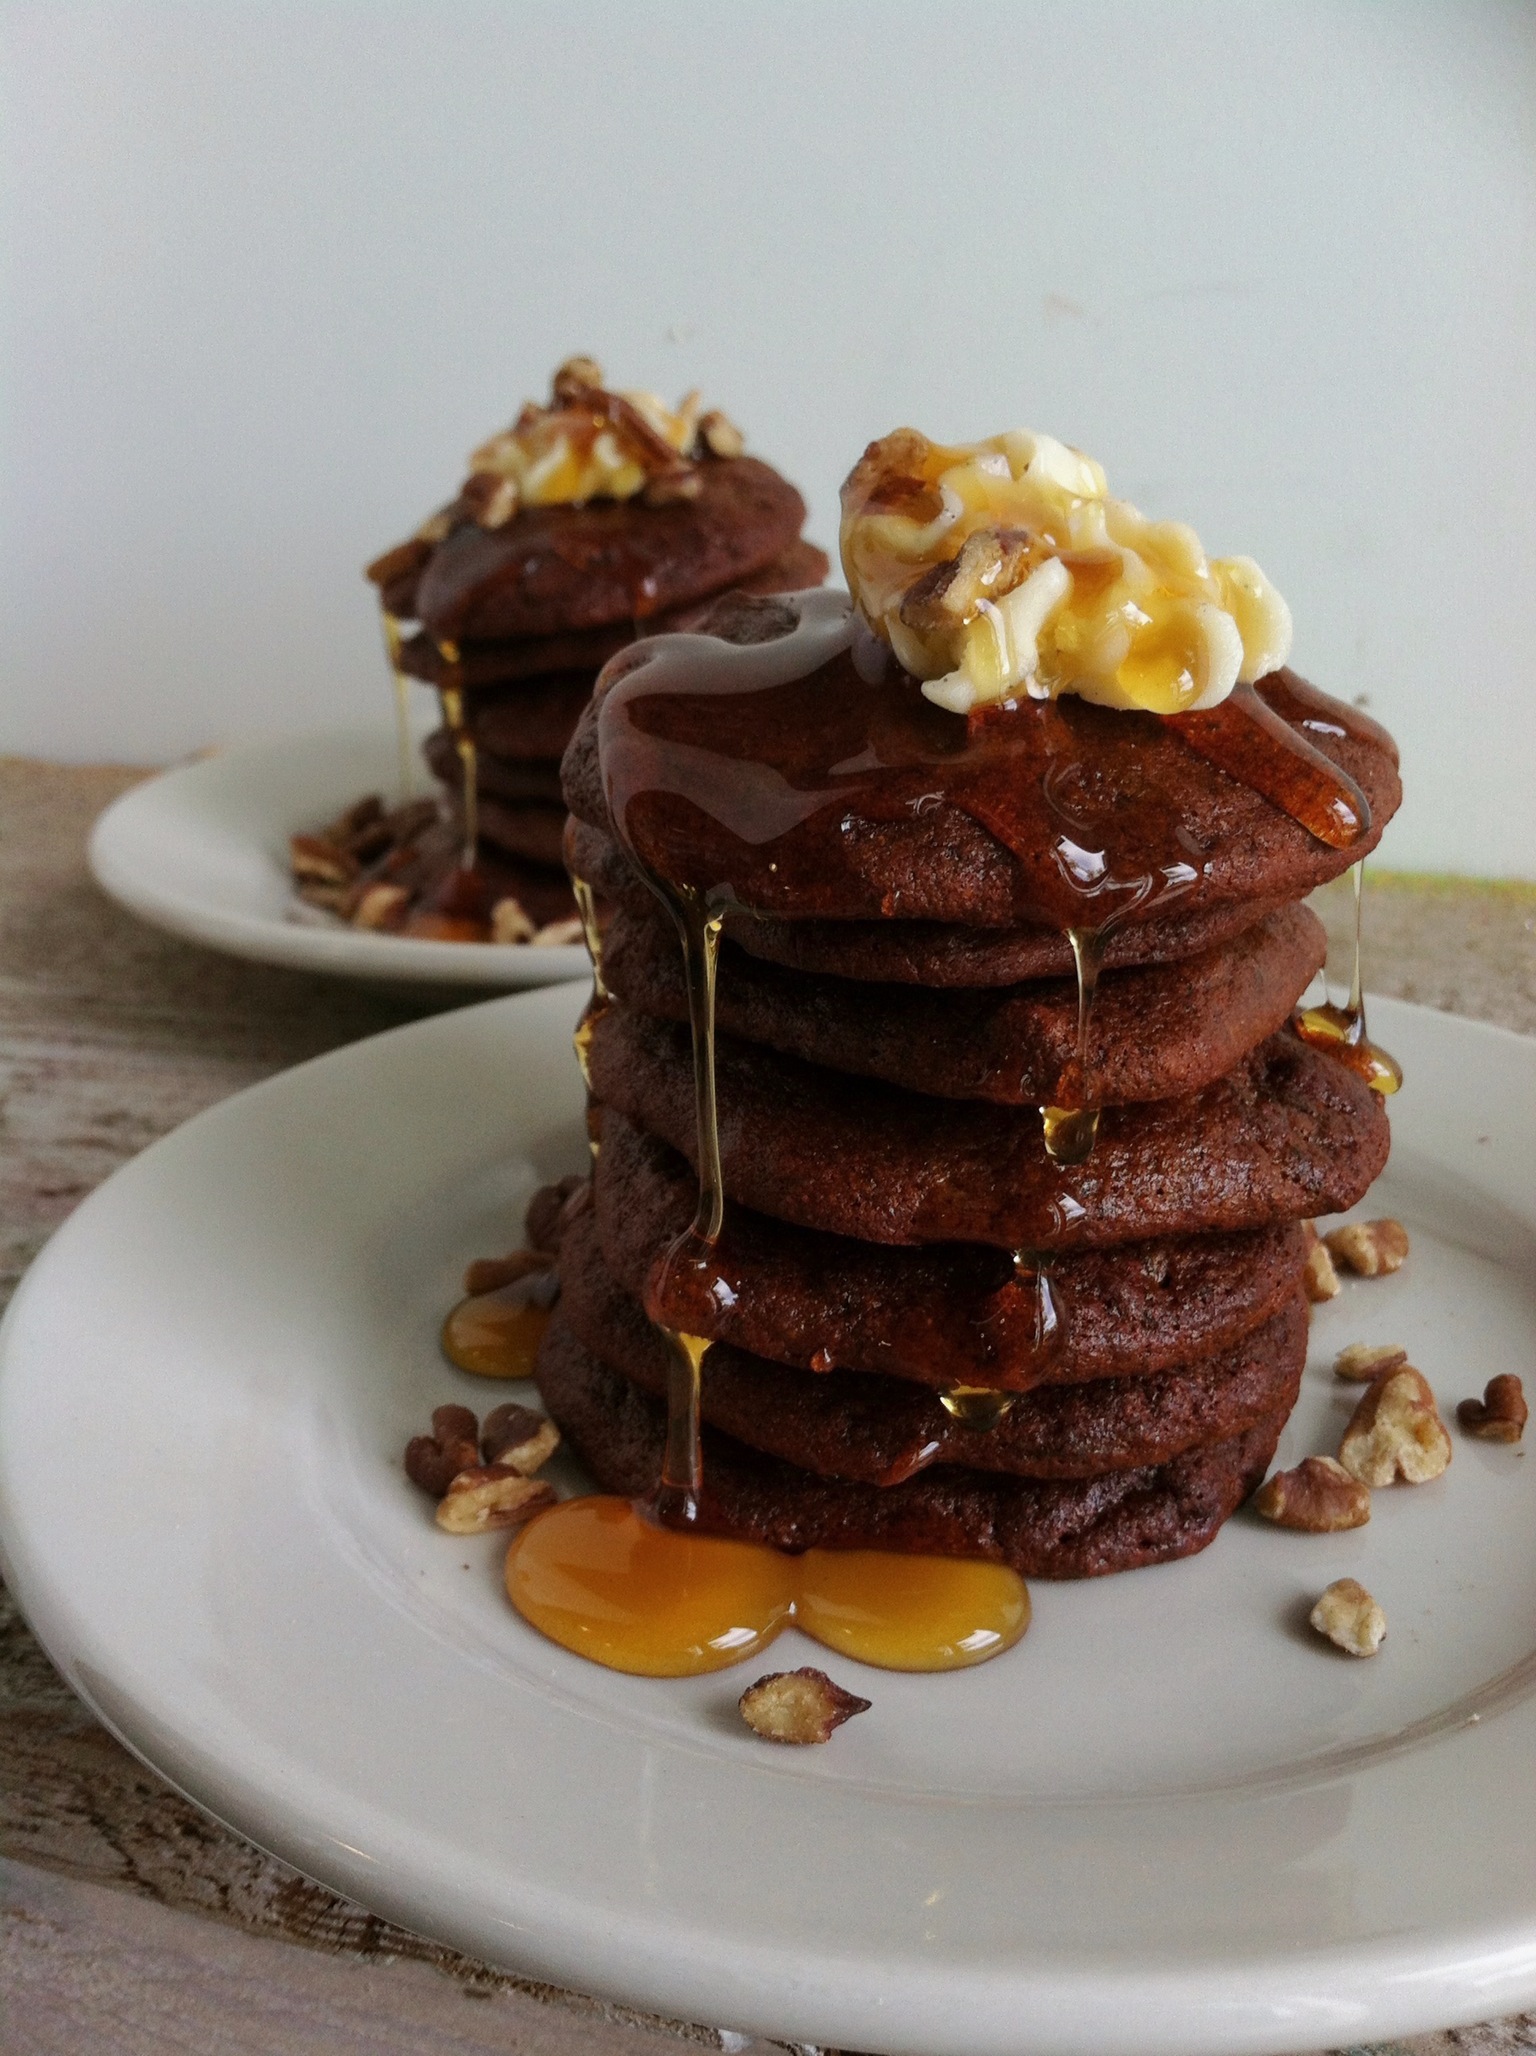
Banana Nut Pancakes (Gluten-Free, Dairy Free)
 So this unique combination of avocado and banana has been on my mind lately. Just a small addition of cocoa powder will transfer these few ingredients into a healthy and simple chocolate pudding. The only thing is I’m not supposed to have chocolate anymore, of any kind. Yes…very depressing.
But as I was scrolling through my instagram feed this morning I found a post about banana nut cookies with an avocado/banana base. This coincidence stopped me in my tracks and I decided to test them out right away. The result was a light and airy cake that matches perfectly with a dab of butter and a drizzle of honey on top.
Banana Nut Pancakes
Preheat oven to 275
- 2 bananas; mashed
- 1/2 avocado; mashed
- 1/3-1/4 cup of honey
- 1 TBS vanilla bean paste
- 2/3 cup gluten free flour
- 1/4 cup pecans; chopped
- 2 1/2 tsp baking soda
- 1/2 tsp cinnamon
1. Mix the wet ingredients.
2. Mix the dry ingredients, and add to the wet.
3. Fold in the pecans.
4. Spoon the batter onto a parchment paper covered baking sheet and bake for 7-10 minutes.
5. Remove from the oven and let sit for 2-3 minutes. Top with a slab of butter and drizzle of honey.
Enjoy!
Superfood Salad with lemon vinaigrette
 Superfood Salad with Lemon Vinaigrette
This seems to be the perfect dish to bring to a BBQ, picnic, or just serve as part of your dinner. It’s light but filling, loaded with health benefits like protein/fats/vitamins, and is simple to make. The lemon vinaigrette is the perfect touch to bring all the flavors together. Get your grains soaking and start making this tonight!
*Follow Kristin at Iowa Girl Eats at http://iowagirleats.com for amazing recipes just like this one that she came up with! Thanks Kristin!!
Ingredients
- 1/2 cup dry quinoa
- 1/3 cup red onion, chopped
- 1 orange, peeled, and segments chopped
- 1 avocado, chopped
- 1 cup canned black beans, rinsed and drained
- 1 cup pomegranate arils
- 1 cup frozen corn, thawed
- 1/3 cup cilantro, chopped
- salt & pepper
For the lemon Vinaigrette:
- 2 lemons, juiced
- 2 garlic cloves, finely minced
- 1 TBS sweetener (honey, agave…)
- salt & pepper
- 6 TBS extra virgin olive oil
Directions
- Soak the quinoa in a bowl of water and let sit for at least 10 minutes. Once soaked, rinse quinoa extremely thoroughly!
- Heat up a dash of oil in a pot and add quinoa. Let the quinoa toast for 2 minutes, then add 2 cups of water and bring to a rapid bowl. Once a boil has been reached, reduce the heat to a simmer. Cover the pot and let sit for 15 minutes. Once the quinoa is done cooking, take a fork to the quinoa and fluff it. Set aside to cool.
- For the lemon vinaigrette, combine all ingredients in a mason jar and shake to combine.
- Combine all the ingredients together in a large bowl and pour the vinaigrette on top. Mix, serve, and enjoy!
*If you don’t have pomegranate arils, you can replace them with chopped strawberries, watermelon, or even jicama!
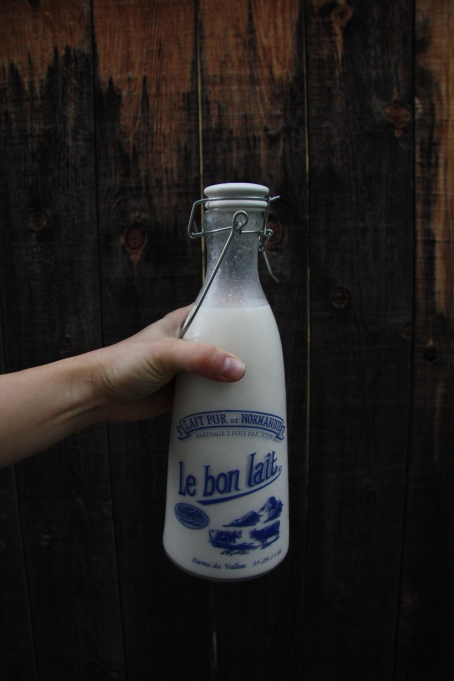
Almond Milk
 This has to be one of the most convenient recipes that you can start incorporating into your lifestyle, not only for the simplicity and ease on how to make it but also the affordability and health benefits it offers.
The store-bought almond milk (unsweetened vanilla by Blue Diamond) I drink is fairly healthy compared to dairy based milks, however it still contains some unnecessary added ingredients. What better way to fix this problem than by making your own. You know the source of your product, you know what you’re putting into it, and you can adjust the ingredients to suit the flavor profile that you’re after. This almond milk recipe is your baseline. It has just a little bit of sweetness, which I recommend keeping in the recipe, although you can substitute or remove it if you like.
Almond Milk
Ingredients
- 4 1/2 cups water
- 1 1/2 cups raw almond (*soak overnight)
- 3 medjool dates
- 1 teaspoon vanilla extract
Directions
- Place all ingredients into Vitamix or high-powered blender.
- Turn machine on and slowly increase speed to its high power.
- Blend for 40 seconds or until desired consistency.
- Pour almond milk into a sieve or nut milk bag to remove the almond pulp.
- Pour the liquid into a glass bottle and store in the refrigerator.
*Soaking your nuts, seeds, or any type of legumes will help with the digestion process in your body. Not only will it make the nutrients easier to absorb into your system, but soaking or sprouting activates the enzyme. The more enzymes in your body, the better your body works! Soak them the night before you plan on making your milk so that they are ready to go first thing in the morning.
Now the only thing left to do is to figure out a recipe for the almond pulp. Any ideas out there? I’m thinking of making a raw cookie or energy bar with it. If you know of a recipe, please send it my way or email it to me at muddyfootsteps@yahoo.com I’ll make sure to feature you or your blog with the link!
Orange Julius
…but most of all,  I’m thankful for the jumbo bag of freshly picked oranges that arrived at my house Thanksgiving day. Okay, maybe not entirely true, but I’m sure happy that I have them.
Let’s eat.
Orange Julius
- 8 oz orange juice
- 1 1/2 cups ice
- 1 cup almond milk
- 2 raw eggs
- 1 TB raw honey
- 1 TB vanilla extract
Blend all of the ingredients together, except for the ice. The combination of eggs, milk, and orange juice will blend together into a creamy, frothy drink. Add the ice and blend until completely crushed. Stick in a straw and suck down. This classic drink is perfect for any kind of day, especially while living in Southern California on a 80 degree day in the middle of November. Rough life on the west coast.
Triple Chocolate Cake Truffles
 I’m still sitting here at my table, slightly shocked on the outcome of these truffles. I mean, I expected them to taste good, but I didn’t realize the potential these puppies had and how good they really turned out.
I found this recipe while scrolling through the blog of Civilized Caveman . If you haven’t checked out George’s blog yet, make sure to do so because not only does he feature some mouth-watering treats and dishes, but they’re fairly easy to replicate and the quality of ingredients he showcases are incredible. He posts a large spectrum of recipes from sweet treats to smoked meats so you’ll definitely be able to find something on his site that you’ll want to make yourself.
Jenni from The Urban Poser made a guest appearance on George’s blog, and I’m so happy that she did. Just from the quick glance it took me to look at the photos of these triple chocolate truffles,I was instantly hooked! She took a unique spin with her recipe and added a little kick of chipotle. I love mixing up the flavor combinations to give the original recipe more flare. Today I decided to stick with the basics and take her recipe and make triple chocolate truffles with a variety of toppings.
Definitely make sure to check out both of their blogs and test out some of their delicious recipes. In the meantime, head to your kitchen and whip up a batch of these truffles. You won’t regret it.

 Triple Chocolate Cake Truffles
(recipe from The Urban Poser)
Ingredients
Chocolate Cake
- 1/2 cup coconut flour
- 1/2 cup cocoa powder
- 1/2 teaspoon cinnamon
- 1/4 teaspoon salt
- 1/4 teaspoon baking soda
- 5 eggs
- 1/2 cup coconut oil
- 1/2 cup honey
- 1 teaspoon vanilla extract
- 1/4 cup enjoy life chocolate chips (set aside for later)
- 1/3 cup coconut oil, liquefied
- 1/3 cup cocoa powder
- 1/4 cup raw honey
- 2 tablespoons coconut milk
Dipping Chocolate
- 1 1/2 cups enjoy life chocolate chips
- 2 tablespoons coconut oil
Directions
Chocolate Cake
- Preheat oven to 350 degrees.
- In a small bowl, combine the dry ingredients together.
- In a larger bowl, combine the wet ingredients.
- Using a mixer on medium-speed, mix the dry ingredients into the wet. Mix until completely combined and no lumps remain.
- Pour into a greased, 7 x 10 (or 8 in. squared) pan.
- Bake at 350 degrees for 25 min or till the cake springs back when gently pressed.
- Cool slightly. Break the cake into crumbs and cool completely before adding the ganache.
- In a small bowl, combine the oil, cocoa and honey.
- Using a whisk or a mixer, beat the ingredients till well combined and there are no lumps of cocoa left.
- Add the coconut milk and continue beating till the ganache becomes thick, smooth and glossy.
- Mix the ganache and chocolate chips into the cake crumbs. Combine well.
- Using your hands or a rounded tablespoon, scoop out dough and form into 1-1½ inch round balls.
- Set on a parchment covered cookie sheet and place in the freezer for 10-15 minutes to firm up..
- Prepare the Dipping Chocolate while the cake balls are chilling. *Instructions below
- Once the truffles have been cooled and firmed, drop them into your dipping chocolate, completely coating all parts of the truffle.
- Remove the truffles from the chocolate sauce with a fork, holding and lightly tapping the fork against the bowl to remove excess chocolate.
- Dip, sprinkle, coat, or roll your coated truffles into a variety of toppings. I used crushed walnuts, chia seeds, cocoa powder, and sea salt.
- Stick back into the freezer for 10-15 minutes then dig in!
- Add chocolate chips into a microwave safe bowl and microwave for 30 seconds. Remove, stir, and replace back into the microwave for an additional 20 seconds. Repeat until the chocolate chips are just about melted.
- Add coconut oil to the chocolate chips and mix until completely combined, glossy, and smooth texture has been achieved.
Thanks again to Jenni for this amazing recipe. It’s much simpler to make then the long list of ingredients and directions seems to show. I’ve already had a few requests for these to be christmas presents. How does a peppermint truffle with crushed candy canes sound?! But before I jump into such holiday spirits, I’m going to try Banana Walnut truffles with a salted caramel coating. Sound like you might be interested in this future recipe?
Butternut Squash Fall Waffles
 My alarm was set for 6:50 am, workout clothes laid neatly on the floor, and my body was warm and cozy deeply hidden amongst a mountain of blankets. My intentions for the morning were to rise and sweat my tush off at the gym. The stair master has been my choice of cardio equipment for the past few days since I re-introduced the kindle fire back into my life. I loaded up Netflix and Hulu Plus onto this godsend of a gadget and it has me completely consumed and distracted while I torch away calories and build up sweat puddles on those endlessly revolving steps.
The alarm goes off. I’m one of those rare breeds that doesn’t prefer to smash down the snooze button and I don’t have the need for my alarm clock to sound like a fire engine five inches from my face. However, today was a different story and I wasn’t ready to get up and get moving. I’ve been busting my booty, literally, in the gym and outside everyday and this was just my body telling me that I needed rest. I decided to sleep in, have a relaxing morning, and make a comforting breakfast.I burried my way back into the sheets and shut my eyes for what seemed to be another hour. Soon enough fall aromas were going to be perfuming my kitchen and creeping their way throughout the remainder of the house.

Butternut Squash Fall Waffles
These waffles are perfect to share between you and your significant other on a cold and quiet morning. A sprinkle of nuts, a handful of dried fruit, and a ladle of maple syrup on top will be enough to give yourself a foodgasm. Their fall flavors are the perfect match to a steaming, hot cup of coffee.
Ingredients
- 1/4 cup coconut flour
- 1 cup roasted butternut squash
- 1/2 cup pecans (optional: sauté pecans in a little bit of coconut oil prior to mixing with batter. It will bring out the flavors in the nut)
- 1/2 cup raisins
- 1 egg + 2 whites
- 4 tablespoons almond milk
- 1 tablespoon unsweetened cocoa powder
- 1 teaspoon cinnamon
- 1/4 teaspoon ginger
- pinch of sea salt
- coconut oil/butter (to lubricate the waffle maker)
Directions
- Combine all ingredients, except for pecans, raisins, and coconut oil/butter, into mixer and mix until thoroughly combined. The temperature of your kitchen could change the consistency slightly. Adjust the coconut flour and/or almond milk to suit the desired consistency. You want your batter to be thick, but a little liquidy. If it’s too thick, add more milk. If it’s too thin, add more flour.
- Add pecans and raisins to the batter and continue mixing just until combined.
- Heat your waffle maker and lubricate with coconut oil/butter.
- Add batter to maker and cook until done.
- Serve warm, flooded with toppings, and right alongside a mug of your favorite morning beverage.
Topping options: Pure maple syrup, Walden Farms syrup, coconut flakes, chocolate chips, nuts (pecans, walnuts, almonds, cashews), nut butter, coconut butter, powdered sugar…
Also, I finally made the switch from the url of muddyfootsteps.wordpress.com to muddyfootsteps.com . It’s easier to access, remember, and hopefully share with your friends and family. To make reading my blog posts and having access to new recipes easier, subscribe to my blog and you will receive an email each time I make a new post.


leave a comment